IIS-Denial of Service and SQL Injection handling
Generally, when you are hosting web sites in IIS in web farm, the denial of service and SQL injection detection parameters can be configured on the Load Balancer. However to add an extra layer of protection you can configured it within each web farm server.
This is especially handy in case of small or medium business web sites on independent servers. Below is the configuration entries to prevent image stealing and SQL injection.
If both of the entries are being they can applied to each web site under requestFiltering/filterrules as two rules in %windows%\System32\inetsrv\config\applicationHost.config
- To prevent user agents or image stealing agents. The configuration entry is made applicationhost.config
<requestFiltering>
   <filteringRules>
      <filteringRule name="imagestealing" scanUrl="false" scanQueryString="false" scanAllRaw="false">
         <scanHeaders>
            <add requestHeader="User-agent" />
         </scanHeaders>
         <appliesTo>
            <add fileExtension=".gif" />
            <add fileExtension=".jpg" />
            <add fileExtension=".png" />
         </appliesTo>
         <denyStrings>
            <add string="leech-bot" />
         </denyStrings>
      </filteringRule>
   </filteringRules>
</requestFiltering>
2) To block sql injection
<requestFiltering>
   <filteringRules>
      <filteringRule name="SQLInjection" scanUrl="false" scanQueryString="true">
         <appliesTo>
            <clear />
            <add fileExtension=".asp" />
            <add fileExtension=".aspx" />
         </appliesTo>
         <denyStrings>
            <clear />
            <add string="--" />
            <add string=";" />
            <add string="/*" />
            <add string="@" />
            <add string="char" />
            <add string="alter" />
            <add string="begin" />
            <add string="cast" />
            <add string="create" />
            <add string="cursor" />
            <add string="declare" />
            <add string="delete" />
            <add string="drop" />
            <add string="end" />
            <add string="exec" />
            <add string="fetch" />
            <add string="insert" />
            <add string="kill" />
            <add string="open" />
            <add string="select" />
            <add string="sys" />
            <add string="table" />
            <add string="update" />
         </denyStrings>
         <scanHeaders>
            <clear />
         </scanHeaders>
      </filteringRule>
   </filteringRules>
</requestFiltering>
Export and Import Web Site and AppPools from IIS
One of common issues that developers ask me how can we export/import IIS Web Site and App Pool configuration when moving between servers or especially when migrating or re kicking a server to higher operating system.
This may sound easy and out of the box, but it is not. This is only possible using the command line execution but it will save a lot of time for development team from rebuilding the entire app pool settings.
Here are commands.
- To Export the App Pool configuration in IIS 7.0 and above
%windir%\system32\inetsrv\appcmd list apppool /config /xml > D:\<AppName>_apppools.xml
- To Export the Web Sites configuration in IIS 7.0 and above
%windir%\system32\inetsrv\appcmd list site /config /xml > D:\<AppName>_site.xml
- To Import the App Pool configuration in IIS 7.0 and above
%windir%\system32\inetsrv\appcmd add apppool /config /xml > D:\<AppName>_apppools.xml
- To Import the Web Sites configuration in IIS 7.0 and above
%windir%\system32\inetsrv\appcmd add site /config /xml > D:\<AppName>_site.xml
This export and import approach can be taken for deployment purposes in case you are using in DMZ environments where deploying using Web Deploy is not possible.
It is recommended to verify all the settings once the import is successfully. However the changes should very minimal and should save you lot of time.
WCF and ASP.NET issues on IIS
On Windows 2008 R2 and Windows 2012 (mostly on Windows 2008) it is often noticed that although .NET framework 4.0 is installed, the WCF and IIS seems to be running on .NET 2.0
This commonly occurs due to the way the framework(s) were installed and registered on the OS.
It is especially annoying when this occurs in the production server. I recently realized this and had to work over the weekend to get it resolved. There was need to install few old services and upon activity WCF Http Activation for 3.1 using roles and features the entire v4.0 services stopped working. Sucks isn’t it!!!
After a little bit digging around and searching around, here is the best way to resolve it –
First when this occurs the errors you get are as follows (it may 1 or more of these errors)
- When browsing the URL for .SVC, the internal error has occurred. Unable to determine the script map
- In few cases, unable to determine or find System.ServiceModel v3.0 is displayed. Although the App Pool is set to v4.0
- Finally, when go to the Handler Mappings of the web site or Application svc mapping for 2.0 or 4.0 is not displayed.
Here is resolution steps
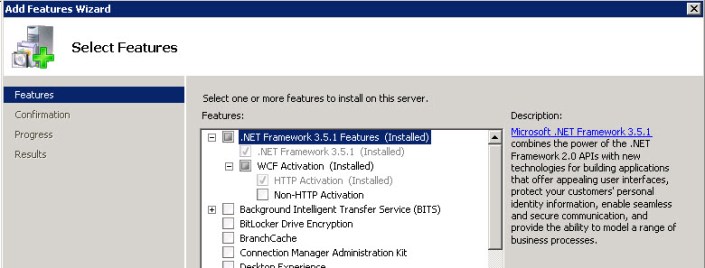
- Firstly make sure if you need v2.0 and v4.0, then the WCF 3.1 Http activation is enabled. You can do this using the Windows Roles and Features MMC. If it is not installed, then install it.
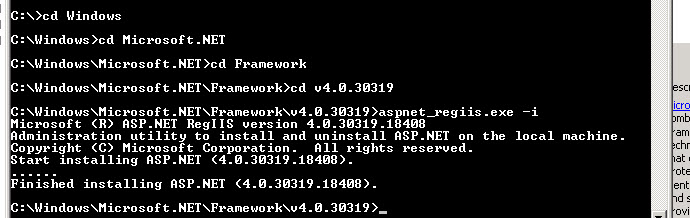
- Once this is done, confirm the registration of the Service Model under 3.0. Hence using Command Prompt in Administration Mode (or Visual Studio Command Prompt) run the following command. If it is already registered the message will confirm if it.

- Now v2.0 version of .SVC is file is registered. Check if the .NET 4.0 of ASP.NET is registered. Hence using Command Prompt in Administration Mode (or Visual Studio Command Prompt) run the following command. If it is already registered the message will confirm if it.
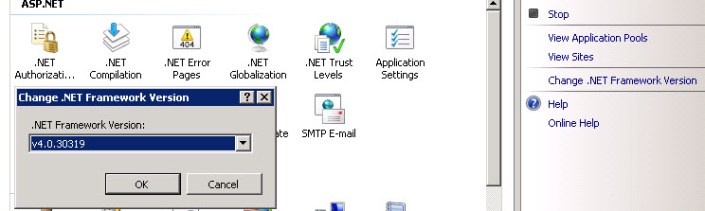
- Finally, confirm if the IIS is running on the default 4.0. This can be done by changing on the IIS.
- Go to the IIS, click on the Machine name note. On the right side click on the Features View Tab, the Change .NET Framework version option appears. Change .NET version version to v4.0
Now go back to web site that wasn’t working and check the Handler Mapping you should see .SVC entries and confirm it by browsing the Service. Now both WCF and ASP.NET should be enabled on both .NET v2.0 and .NET v4.0

asafaweb – Solving common occuring issues
One of activities that you should always do when building a new website is scan you site for vulnerabilities using the https://asafaweb.com/ .
This will scan your site for common issues like Headers exposed,Click jacking, Custom Errors redirection etc.Some of the common errors which get reported are as follows and their resolution is also given
1) Excessive headers: Warning
This is common error that is displayed especially if you are using IIS and ASP.NET. However this is easy to solve using the ASP.NET application’s web.config file changes
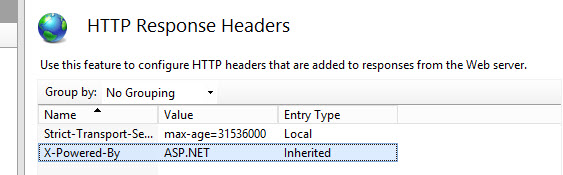
X-Powered-By: ASP.NET
a) In IIS, select the web site. Go to the Http Response Headers option in the Features View. Select X-Powered-By header, and remove it
If needed the same can be done in the web.config
<system.webServer>
<httpProtocol>
<customHeaders>
<remove name=”X-Powered-By” />
</customHeaders>
</httpProtocol>
</system.webServer>
X-AspNet-Version: 4.0.30319
In the web.config file of the associated application, add the following section or modify the section to include enableVersionHeader=false in the http runtime
<system.web>
<httpRuntime targetFramework=”4.5″ enableVersionHeader=”false” />
</system.web>
2) Clicking Jacking : Warning
If this error is received, then add an entry in the web.config file under the customer header section
<customHeaders>
<add name=”X-Frame-Options” value=”SAMEORIGIN” />
</customHeaders>
3) Custom errors: Fail
If this error appears, then in the web.config file make sure the default redirect on error is set so that users are exposed to the actual stack trace. This is very similar to exception sheilding
<customErrors mode=”RemoteOnly” defaultRedirect=”~/DefaultErrorPage.aspx” />
4) Stack trace: Fail
Very similar to custom errors, in the set the custom errors mode to either RemoteOnly or On
<customErrors mode=”RemoteOnly”/>
5) Secure Cookies : Fail
Add the following entry in the web.config. Make sure that your site is enabled for https. If there any http then the session variables will not work.
<system.web><httpCookies requireSSL=”true” /></system.web>
Hope this helps. In case of any question, post questions in the comments section.
Web Api 2.0
I working on 3-tier solution using ASP.NET MVC for an internal business application. Came across an excellent poster highlighting the Web API 2.0 working model. Here it is
